
Contents
Key Takeaways
- The outline method is consistently ranked as one of the best note-taking methods by researchers and students worldwide.
- Outlining is a method that’s remarkably well-suited for online learning as it benefits from methodical, self-paced categorization of information.
- Taking notes with the outline method involves six simple steps, all of which will be explained in this guide.
The outline note-taking method is an indispensable part of many high-achieving students’ skill sets. High-achieving students don’t rely on their “intellectual giftedness.” Instead, they focus on developing effective study skills that enable them to succeed every time, including relying on the benefits of taking notes.
This system of taking notes is one of the simplest yet most effective methods. As long as you follow the simple steps in this guide, you’ll be well on your way to mastering the method and taking the most effective notes possible.
Here’s everything you’ll learn in this article.
The Outline Method
What is the outline method of note-taking?
The outline method is one of college students’ most popular note-taking methods. Through outlining, students organize their lecture information in a structured and logical manner, creating a comprehensive profile of the lecture subject.
The outline note-taking method, similar to the Cornell method, has been around for decades. While the outlining method does not revolutionize the act of taking notes, it has been proven to be more optimized than conventional methods.
The method is considered well-rounded and suitable for most subjects. But, it’s less suited for some STEM subjects such as physics or math. Outlining also requires you to identify a clear, informational structure to the information. That is why the method does not always work well with fast-paced and unstructured lectures. Keep this in mind when planning your outlining.
What do researchers say about outlining?
Educational psychologist Kenneth A. Kiewra from the University of Nebraska is perhaps the best researcher to listen to when analyzing the outline method of note-taking. Between 1984 and 1995, he wrote over 20 research papers on note-taking, many of which used the outline method as a central point.
In his 1995 study, he described the two most significant benefits of outline note-taking – I’ll be paraphrasing here, but hopefully, I’ll get the gist of his points across.
The first benefit of outlining is that the outline structure makes superordinate-subordinate relations within topics apparent. This, in turn, facilitates local coherence.
The second advantage of the outline method is that the act of outlining your topics and subtopics makes information retrieval easier and helps you build internal connections. This helps with global coherence and knowledge retention as all your notes are systematized into topics.
Kiewra was also one of the first researchers to discover that simply handing out detailed notes to students post-lecture can achieve remarkable results. But that’s a topic for another time (if you want more of Kiewra’s thinking, he builds on these ideas in his recent book on studying in college).
What makes the outlining system so effective?
What’s unique about the outline method is that it’s hierarchical by nature. This means that besides recording lecture content, the outlining system also allows students to record the relationships between bits of information.
Having a clear outline format for your notes helps you to:
- Identify all clustering points;
- Turn the main points of the content into study questions;
- Reduce your notes without having to rewrite them;
It has been shown through research that outline note-takers record significantly more information from online lectures than conventional note-takers. While conventional note-takers manage to record up to 30% of lecture materials, outline and matrix note-takers can record approximately 40%.
This shows that unlike the Cornell note-taking method (for which research results have been mixed), the outline method of note-taking is an effective and science-backed method of taking notes. It’s a system that can sometimes be outshined by the matrix note-taking method, but both methods have their rightful place among the best.
As a fully online learner, I use a variation of the outline method myself on a daily basis. However, instead of taking my notes in longhand (with a physical pen and paper), I take mine in a digital format. I am aware of the vast benefits of writing longhand – but I have my own personalized system that works wonders for me. Outlining is a major component of the system I use, and I’ll be covering this personal note-taking system in a future article.
How does the outline method work?
Through indentation and space relationships, outlining provides students with a clear hierarchy of information.
Put simply, the outline method works with the following key characteristics:
- The main topics are recorded on the left side of the document;
- The subtopics are added with an indent to the right of the main topics;
- Any supporting thoughts or facts are added with another indent to the right of the subtopics;
- All further details are added with more indentation.
Developing content outlines like this creates a logical structure for the notes where the level of information importance is demonstrated by its horizontal positioning in the document. If it’s on the far-right side, it’s a smaller subtopic or fact. On the other hand, if it’s on the far-left side, it’s a major topic of importance with many smaller components.
The indents are usually created with bullet points, dashes, numbers, or arrows. Strategic use of these symbols helps reduce the content even further, thus resulting in short but information-rich notes that are easy to review before an exam.
How to take outline notes
To take notes with the outline method, follow these six steps:
- Gather note-taking materials
- Outline the main topics
- Outline the subtopics
- Insert supporting thoughts and facts
- Add further details and examples
- Review and recite your notes
Gather note-taking materials
The outline method does not require an expensive set of tools; chances are you already have all the materials you need. But here’s a quick rundown, just in case.
To use the outline note-taking method, you’ll need the following:
Notebook. Any notebook or notebook paper will do. Personally, I find spiral notebooks to be the most comfortable to use (if you’re looking for one, Mead’s spiral notebooks are affordable and high quality). If you use individual notebook papers for your notes, get a ring binder to hold all the papers together.
Pen or pencil. Once again, any pen or pencil will do the job just fine (although, personally, I’m picky about pencils and prefer the Blackwing 602).
Working area. If you’re taking notes during a lecture, you don’t have much choice in this regard. However, if you’re taking outline notes for an online course, you have more options. Try to find a comfortable and quiet working space and free yourself from distractions. Deep focus requires the right study space – try your best to create and maintain the right environment for yourself.
Now, it’s time to put these materials to use.
Outline the main topics
To start, you’ll need to outline the main topics from the material. These main topics will be written on the left side of the document without any indentation.
Ideally, you’ll have a small number of main topics – even just a single main topic is okay. This is the first of many information organization decisions you’ll be making. And due to the space indentation system of the outline format, these first steps can be some of the most critical.
The main topics should be relatively broad in context but specific enough to develop clear subtopics. It all depends on the material you’re working with. Try not to outline too many main topics, as the format loses effectiveness if it’s too thinly spread out from the beginning. You should leave enough room to be able to drill deep down into a particular main topic.
In the example we’ll be using, retrieved from research by Robinson and Katayama, the main topic of the lecture is “Parasomnias.” It’s a good example of a main topic as it’s suitable for the logical development of subtopics and supporting information.
Outline the subtopics
Now, it’s time to outline the subtopics. These subtopics are written below the main topics with an indentation to the right and with some space between each subtopic to allow the insertion of supporting arguments. Numbers, letters, bullet points, and dashes are commonly used for subtopics to further illustrate their placement within the outline organization.
You’ll likely end up with quite many subtopics in your outlines, and if you’re taking notes during a lecture, you’ll always be adding new subtopics as you go.
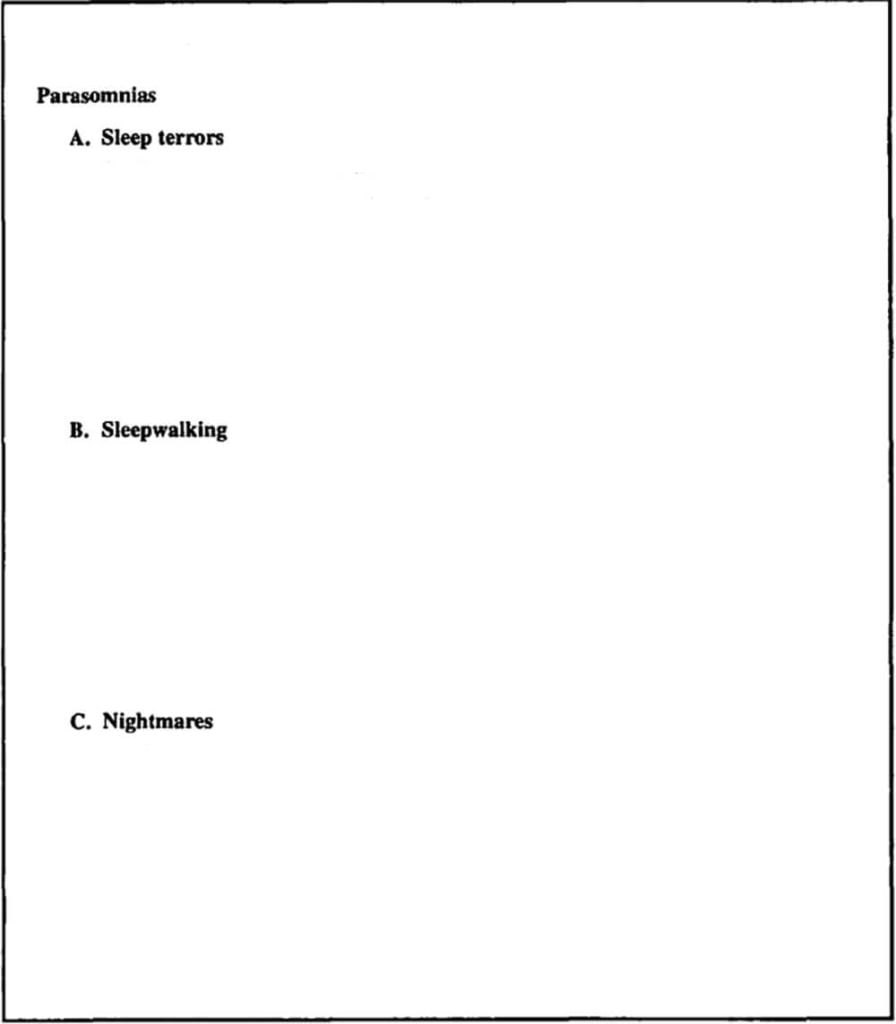
Continuing with the example we chose in the previous step, the outlined subtopics for “Parasomnias” were identified as sleep terrors, sleepwalking, and nightmares. They were indented through lettering to the right, resulting in a clear, logical structure to the notes.
At this stage, the outlined notes should look something like this:
Insert supporting thoughts and facts
Now that you’ve outlined your main topics and subtopics, the only thing left is to start filling in the blanks. This means adding further thoughts, facts, features, and categories into the subtopics – always with an indentation to the right.
Normally, in an academic setting, you should not equate thoughts and facts, but both thoughts and facts are perfectly viable supporting notes in this case. Analyzing your thoughts and noting them is often much better than copying dry facts written by someone else.
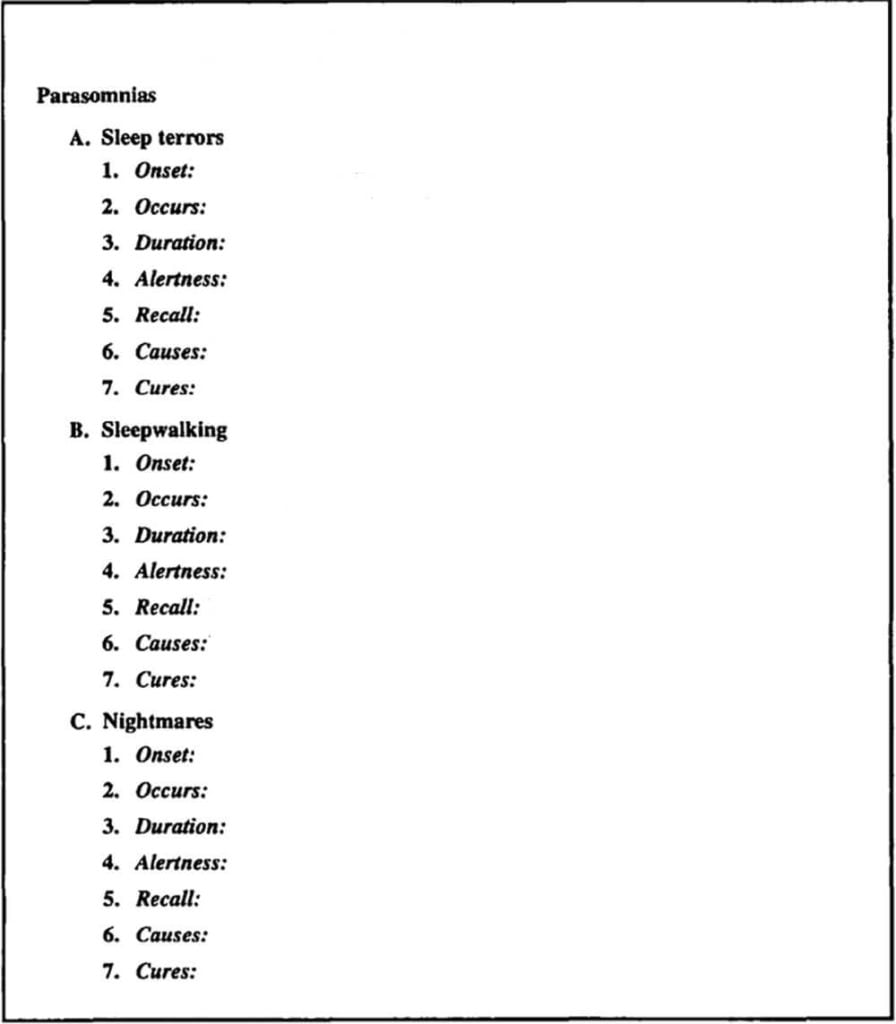
Using the same example as above, supporting information on the subtopics (specific forms of parasomnias) could be categorized into seven parts. These seven sections were then added below the subtopics with a numbered indentation to the right.
By now, the outline notes are already starting to take shape and look like this:
At this point, it’s also worth pointing out that this example would also be well-suited for the charting method of note-taking. That is because the seven supporting categories are the same for all subtopics, and information in this form works well in a table format.
Add further details and examples
Now’s the time to add any final supporting details to the notes. Try to cover all the information you need without writing massive paragraphs. In some cases, where the information does not require different levels of details (in terms of space relationships), this step can be mixed into the previous step. After all, if the supporting thoughts and facts are enough to cover everything, there is no need for further details or examples.
If you do need further details, however, instead of copying lengthy paragraphs word-by-word, try to:
- write short telegraphic sentences;
- draw illustrations;
- cover real-life examples.
Here’s what a completed outline note looks like with all details added to it:
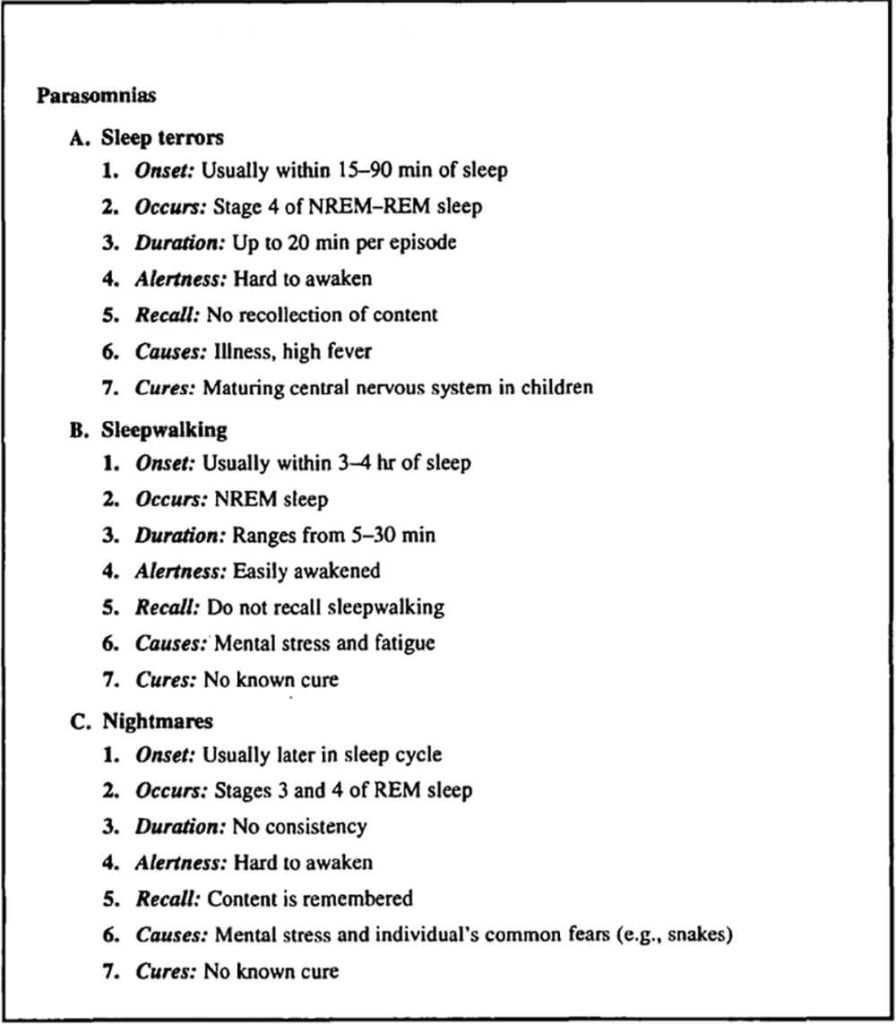
Pay attention to the short sentences used here. By using short sentences, abbreviations, and symbols, you can reduce your notes. This will be very helpful to you during the note review process.
Review and recite your notes
By now, you have finished the note-taking process. But, ain’t no rest for the wicked.
Due to the Ebbinghaus forgetting curve, it’s always best to start the reciting and reviewing stage as soon as possible. Studies have shown that reviewing your notes within the 24-hour point achieves the best results. If you neglect your notes for a whole week after taking them, you’ll lose out on a lot of retention and memorization.
Start this step by reviewing and reciting any information in your notes. Any effort to make the outlines well-structured and easy to follow will pay off tenfold in this step. This stage is also a chance to develop your outlining skills further. If you find that your notes were poorly outlined, you can keep that in mind and make improvements for the next time.
And once you’re done with this step – you’re all done! Congratulations! You’ve now completed the entire outline note-taking process.
Read Next


Originally published January 12, 2022