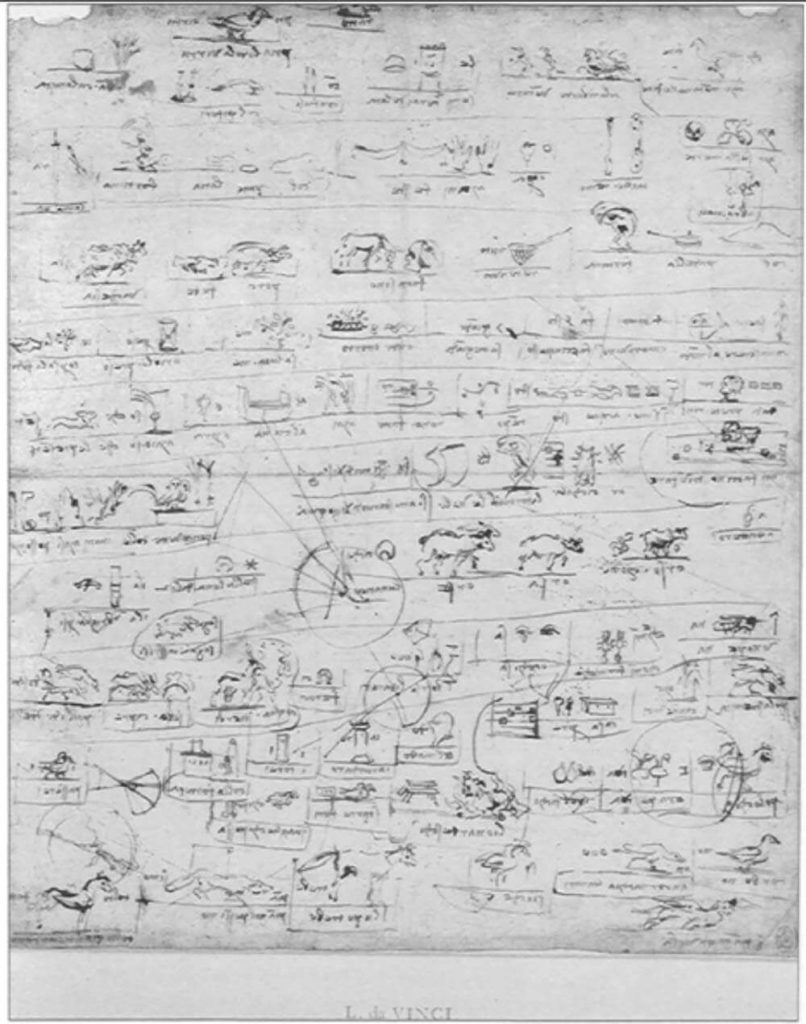
- Initial versions of the mapping method can be seen as far back as in Leonardo Da Vinci’s personal notes from the 15th century.
- Combine the mapping method of note-taking with active recall and spaced repetition for the best study results.
- This method is time-intensive but provides a fantastic visual overview of the relationships between topics, subtopics, and other connected ideas within your learning materials.
The mapping method of note-taking is one of the most difficult, yet rewarding types of note-taking methods in existence. If done well, it can record information with a unique sense of clarity, but if done poorly – the method becomes messy in no time. That is why you’ll want to make sure you understand the fundamentals of the strategy before implementing it in your studies.
The Mapping Method
What is the mapping method of note-taking?
The mapping method of note-taking, also known as “concept mapping,” provides a graphical representation of information, ideas, facts, and concepts. The format involves writing the main topic into the center of the document and connecting related subtopics, ideas, and concepts through branches, images, and colors.
Mapping, similar to the charting method, maximizes active participation in note-takers as it requires them to organize facts, ideas, and information in a logical map. While the charting method utilizes charts for visualization purposes, the mapping method uses maps.
Initial versions of the mapping method can be traced back to Leonardo Da Vinci, who was known for using various mapping techniques in his notebooks:
The modern version of mind mapping was popularized by Tony Buzan – an English author and education consultant. He first brought worldwide attention to the mapping technique with his “The Mind Map Book” (also available on Google Books). The book quickly rose to bestseller status and achieved cult-like status among the productivity crowd.
However, based on modern research, we can conclude that at least some of Tony Buzan’s theoretical framework may have been built on shaky ground at the time of writing his book.
For example, he believed in the theory that the brain has two sides independent of each other. The left is the boring, analytical side, and the right is the creative, fun side. Tony Buzan did not invent this “left-brain-right-brain theory” – he was building on the ideas of Roger Wolcott Sperry and Michael Gazzaniga that they put forth in the 1960s.
Tony Buzan made this theory one of the focal points of his mind mapping method, as the method was supposedly unique in that it enabled you to use both sides of your brain simultaneously.
In 2013, however, this theory was put through modern testing by neuroscientists in a two-year research project. After studying the brains of 1,011 individuals through magnetic resonance imaging, no evidence was found supporting the theory, and it was found that the human brain is constantly receiving input from both sides rather than just one.
This, however, does not automatically make the mind-mapping concept obsolete. In my opinion, it just shows that not all of Tony Buzan’s mapping theoretical concepts should be taken at face value.
It should also be noted that while the flow method of note-taking can look similar to the mapping method, the former is an approach focused on making sense of how concepts inter-relate at a higher level.
What types of subjects is the mapping method suitable for?
The mapping method is best suited for subjects or lectures where the content is well-organized, detailed, and targets a specific concept. Mapping is especially useful if the concept has many categories and subcategories that are all directly or indirectly linked to the main concept.
One of the best examples of a subject where the mapping method is useful is anatomy. In anatomy classes, you could use the mapping method to create a map of the various elements of the human body. Mapping out the entire digestive system, for example, could help you memorize how the various digestive organs interact with each other. This technique could be more effective than simply writing all the names out with standard notes.
It’s worth noting, however, that the usefulness of the mapping method in medicine is still up for debate. A 2002 study conducted amongst medical students showed some positive results for the mapping method. Yet, a 2010 study could not identify any differences in memorization between standard and mapping note-taking (but the benefits of note-taking in general were not put into question!).
Advantages & disadvantages of the mapping method
There are both significant benefits and drawbacks to the mapping method. Use the method selectively, and you’ll use it well. It’s not a universal method that should be used for all lectures and subjects.
These are the primary advantages of the mapping method:
- Intra- and inter-relationships between facts and concepts are easily visible
- Analyzing and reviewing mapped notes is efficient
- Mapped notes are easy to edit by adding further branches
- Pictures and colors facilitate memory and appeal to visual learning styles
- Analyzing conceptual relationships allows students to reach a metacognitive level
On the other hand, these are the main disadvantages of the mapping method:
- Facts and thoughts can be difficult to distinguish,
- Mapped notes often have to be used alongside other methods, such as the Cornell method or outline method,
- Requires strong concentration skills,
- Mapping can get overwhelming for complex subjects, and students can easily miss making all the connections.
How to take notes with the mapping method
To take notes with the mapping method, follow these five steps:
Write down the main topic
To begin taking notes with the mapping method, you first need to identify the main topic that you want to start mapping out. This main point should be the primary concept of the learning materials you’re working with. It will serve as the central focus point of the entire map, so it’s important to get this choice right from the get-go. Otherwise, you might end up having to remap your notes, which admittedly is something I’ve done many times before.
You mustn’t choose a very narrow topic here, as a very narrow topic will not give you enough subtopics to create a proper map. At the same time, if you choose something too broad, your map might end up becoming overly massive. In the end, just give it a go and choose a topic – the best way to learn is by doing!
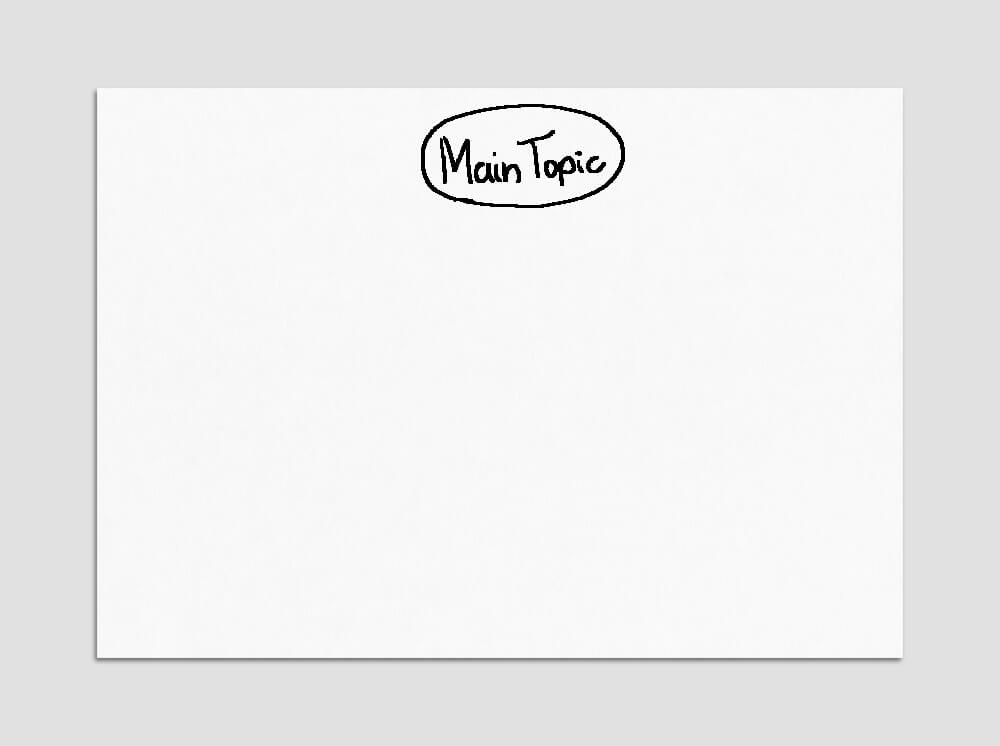
Now, write down the primary topic in the middle of the document and draw a circle around it. Some people recommend placing the main topic right in the center of the page, while others place it on the top of the document. I have found mapped notes to be easier to follow if the top is used for the main topic. Some people do prefer the aesthetics of notes with a map that starts from the very center of the page, though.
Here’s an illustration that shows where and how I write down the main topic:
Add and connect subtopics to the main topic
What are the subtopics for the main topic that you’ll be covering on the map?
If your chosen main topic is “Parasomnias”, your subtopics might be “sleep terrors” or “nightmares,” for example.
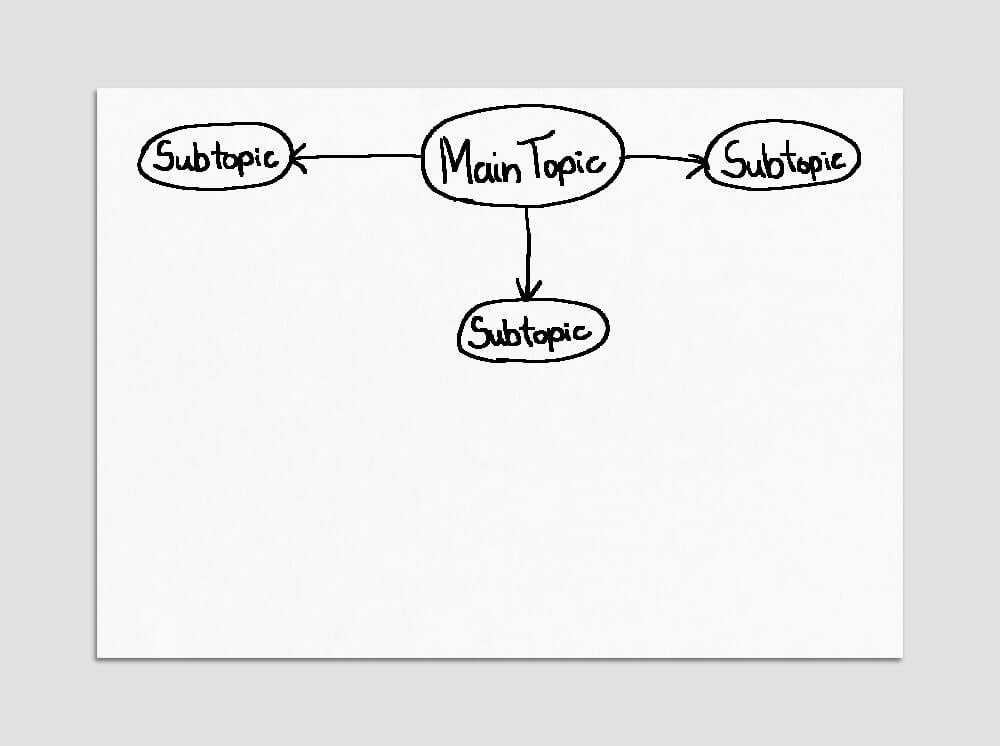
Write down these subtopics around (or below) the main topics and draw circles around each of them. Then, connect the main topic to the subtopics with arrows (or just straight lines if you prefer).
By now, you should already start to see a structure to your map. You have the primary concept and smaller subtopics branching out from it. This is the essence of the mapping method – larger concepts branching out into smaller concepts.
Here’s what the map looks like at this stage of the process:
Connect supporting ideas to the subtopics
This step is essentially a repeat of step #2. Once again, you’ll be branching out; only this time, you will start branching out from the subtopics rather than the main topic.
To do so, ask yourself the same question as before. What are some supporting ideas (or subcategories) for the subtopics?
Depending on the complexity of the topic you’re working with, you might even be able to bypass this step. If you’re mapping a topic that does not have a second level of subcategories, then there’s no reason to add supporting ideas to the subtopics. If that’s the case, go straight to step #4 and connect the details and facts to the subtopics instead of the supporting ideas.
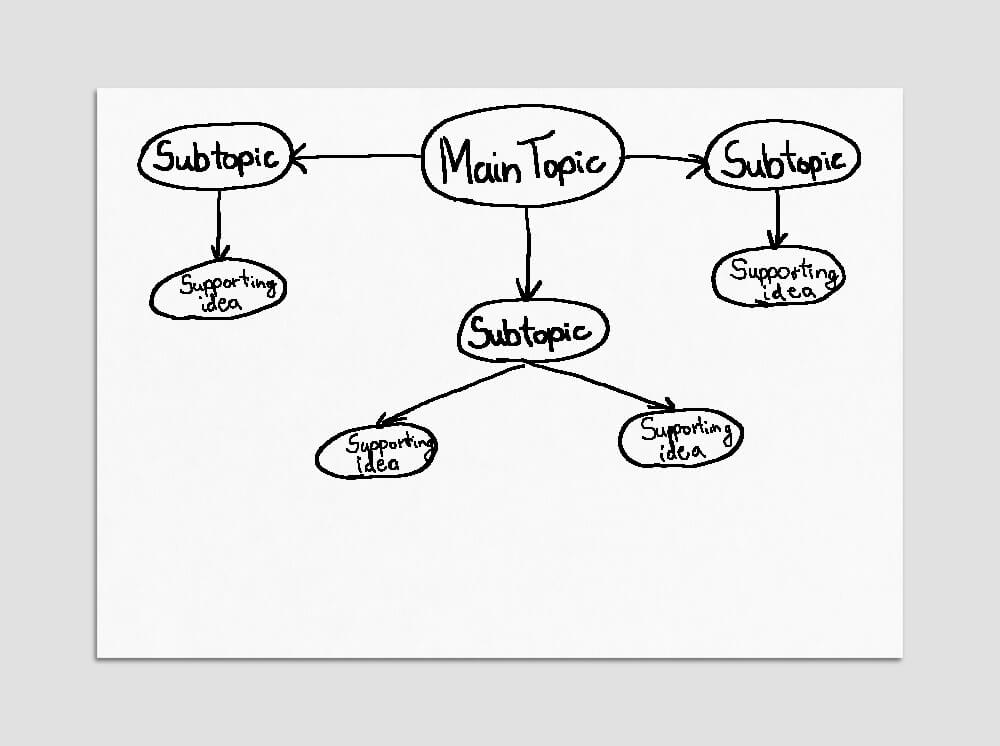
If you could identify the supporting ideas, then write them down around the subtopics, encircle them, and connect them with arrows just as before.
Your map should look something like this after completing this step:
Add further details and facts to the supporting ideas
This is the final step of the mapping process.
Until this step, you were essentially categorizing the information you’ll be noting, and now, it’s time to fill in the missing information.
Start adding any further details, facts, and thoughts into the diagram and connect them to the supporting ideas. At this point, it’s not necessary to encircle each fact and detail, but you can still do so if you prefer.
In this illustration, you can see where the supporting ideas start branching out. That is where you would want to start adding any further details and facts. However, for the sake of simplicity, I did not include them in the drawings.
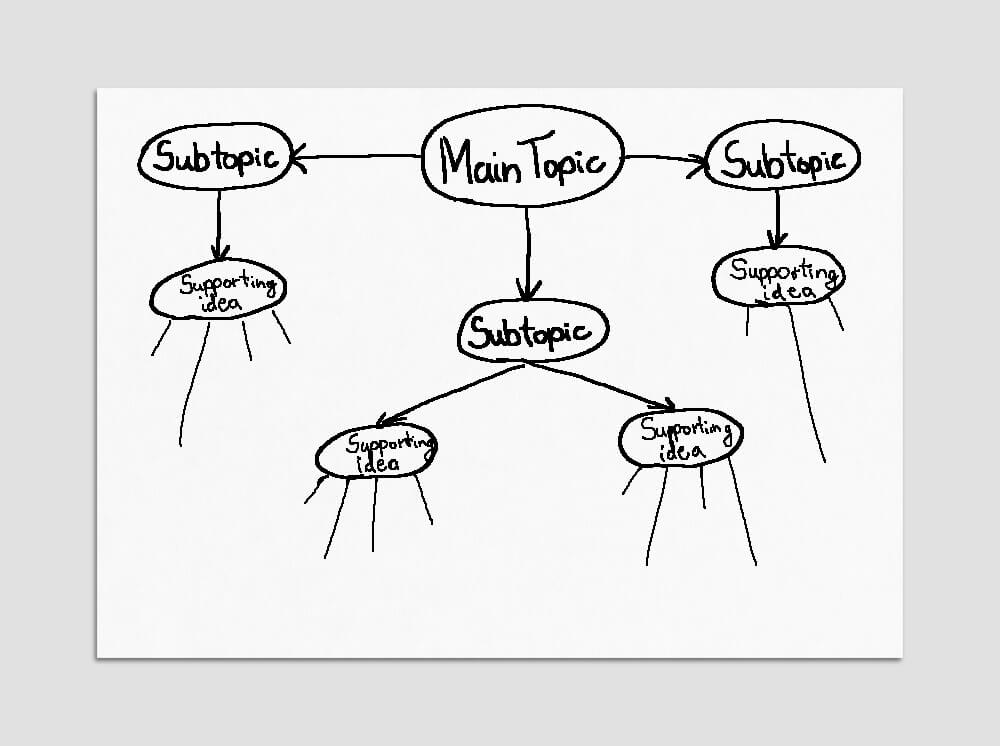
And, assuming we filled in all the details and extra facts, it’s now a good idea to start adding some colors to the map. This will help you identify the various groups of topics more easily, and it’ll give you a better visualization of the relationships between facts and concepts.
Here’s what the example map looks like after adding some colors to the different categories of information:
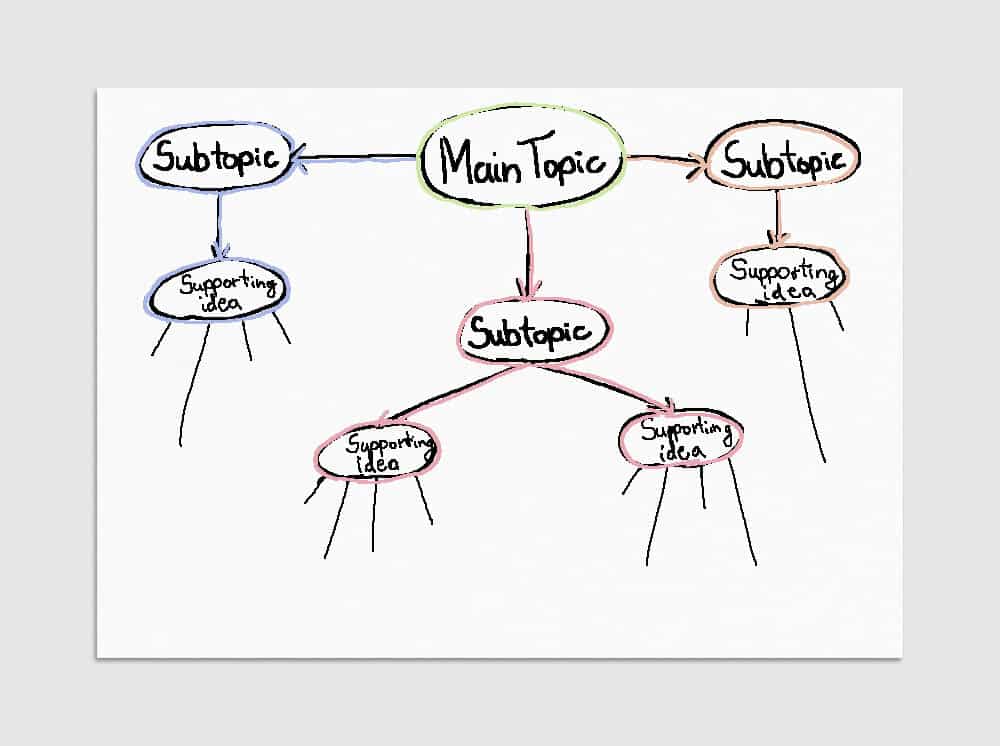
While it looks very basic, this is essentially the skeleton of a standard mapping note. Fill that in with any relevant bits and pieces of information from the materials you are studying and then you’ll have everything set and done.
Review the mapped notes
The review process for the mapping method is unique in that it requires you to recall the entire structure of the lecture. Instead of reciting a small section of your notes, you will have to look at the central concept as a whole, and this forces you to truly check your understanding of the materials.
Start the review process by covering lines from the notes with your hand for memory drills. Try to visualize the spatial relationships in your head and understand where the information you’re reciting belongs in the overall map. Go over subtopic by subtopic, and recite both the supporting facts and their location within the hierarchy of information.
As mapped notes tend to be relatively minimalistic, it can sometimes be helpful to have extra reading materials or the source material at hand during the review process. If any questions arise while reviewing, you can refer back to the source and material and clarify any information on the map whenever needed.
Once you’ve reviewed your notes, you’re all done – you’ve completed the mapping method of note-taking!


